

Should I have a Bleeding Control Kit for Knifemaking and Blacksmithing?
Introduction

Safety, both inside and outside the workshop, is a somber topic. Thinking of and planning for the worst-case scenarios can be scary, and understanding the equipment and skills you need to render aid can be intimidating.
It’s important to remember, however, that the costs of not being prepared can be dire. Something like a Bleeding Control kit is designed to provide life-saving capability during an event where 3-6 minutes is the difference between life or death. We aren’t trying to scare anyone into anything; similarly, this article is not intended to be a step-by-step guide to dealing with traumatic injuries. It is a stepping stone, an introduction to that material and equipment.
This is a heavy, serious topic that we firmly believe every craftsman needs to address for themselves and their own workshops. As the name suggests, these kits and their contents are used to control bleeding. What contents are generally in a bleeding control kit, why and when would you use them? Fear not, we’ll provide an overview of all of it and point you towards good supplemental education options.
Scene Safety:
As someone responding to a traumatic injury, you need to ensure your own safety first. If you end up injured on the same scene, you can no longer effectively render aid and EMS will also have to assist you additionally. Ensure that the scene is safe, look for and control the mechanism of injury, a bandsaw for example; if someone in our shop severely injures their hand while working with the bandsaw, we need to control that first. Turn it off, unplug it, do whatever you need to do to ensure your safety, so that you can treat the injured party.
PPE:

Personal Protective Equipment. Use nitrile gloves (Not black, blood is very difficult to see) to avoid blood-borne pathogens.
Massive Hemorrhage:
A large amount of blood coming out of a wound quickly, from a severed artery or vein. Some characteristics of massive hemorrhaging are continuous bleeding, a large amount of blood, and blood pooling under and around the patient. This is the type of bleeding that can kill someone in 3-6 minutes.
Tourniquet:
A tourniquet is a device used to stop severe bleeding from a vein or artery through compression. There is a myth that by applying a tourniquet, that person will de facto lose that limb. This is untrue. It is based on old, outdated information. A modern tourniquet, properly applied, can be there for hours before permanent damage will begin to occur. Additionally, a tourniquet may be the best option for the injury, and that alone outweighs any potential limb loss. Generally, the 2 most widely issued tourniquets are CAT’s and SOF-T’s, but beware of knockoff versions of these. Tourniquets should generally only be applied to limbs, but not over joints, like your knees or elbows. You can either go as high on the limb as possible, or 1-2 inches above the wound. Keep in mind that 1 tourniquet might not be enough to stop the bleeding, and if so, you'll want to place the second tourniquet above the first one. Once applied, a tourniquet should only be loosened or removed by higher care.
Nasopharyngeal Airway:
Also known as an “NPA”, this is a type of airway adjunct, and is meant to provide a secure airway when a person can not breath normally due to some type of damage or obstruction. Generally, this is reserved for unconscious patients and those with injury to the face, making breathing difficult. While this item isn’t very difficult to use, you should receive proper training on it before attempting it yourself. However, it never hurts to have one in your trauma kit.
Compressed Gauze:
This is a type of gauze that is tightly compressed to store easier, and can be used as a backing for hemostatic agents or wound packing.
Hemostatic Gauze:
Also referred to as “Combat Gauze,” this is a type of gauze that has minerals infused into it to help promote clotting of blood, and when properly packed, adds additional pressure closer to the source of the bleeding, ie the artery or vein. Gauze is generally used to pack wounds to the joints, like your hips and shoulders, not your abdomen or limbs.
Chest Seal:
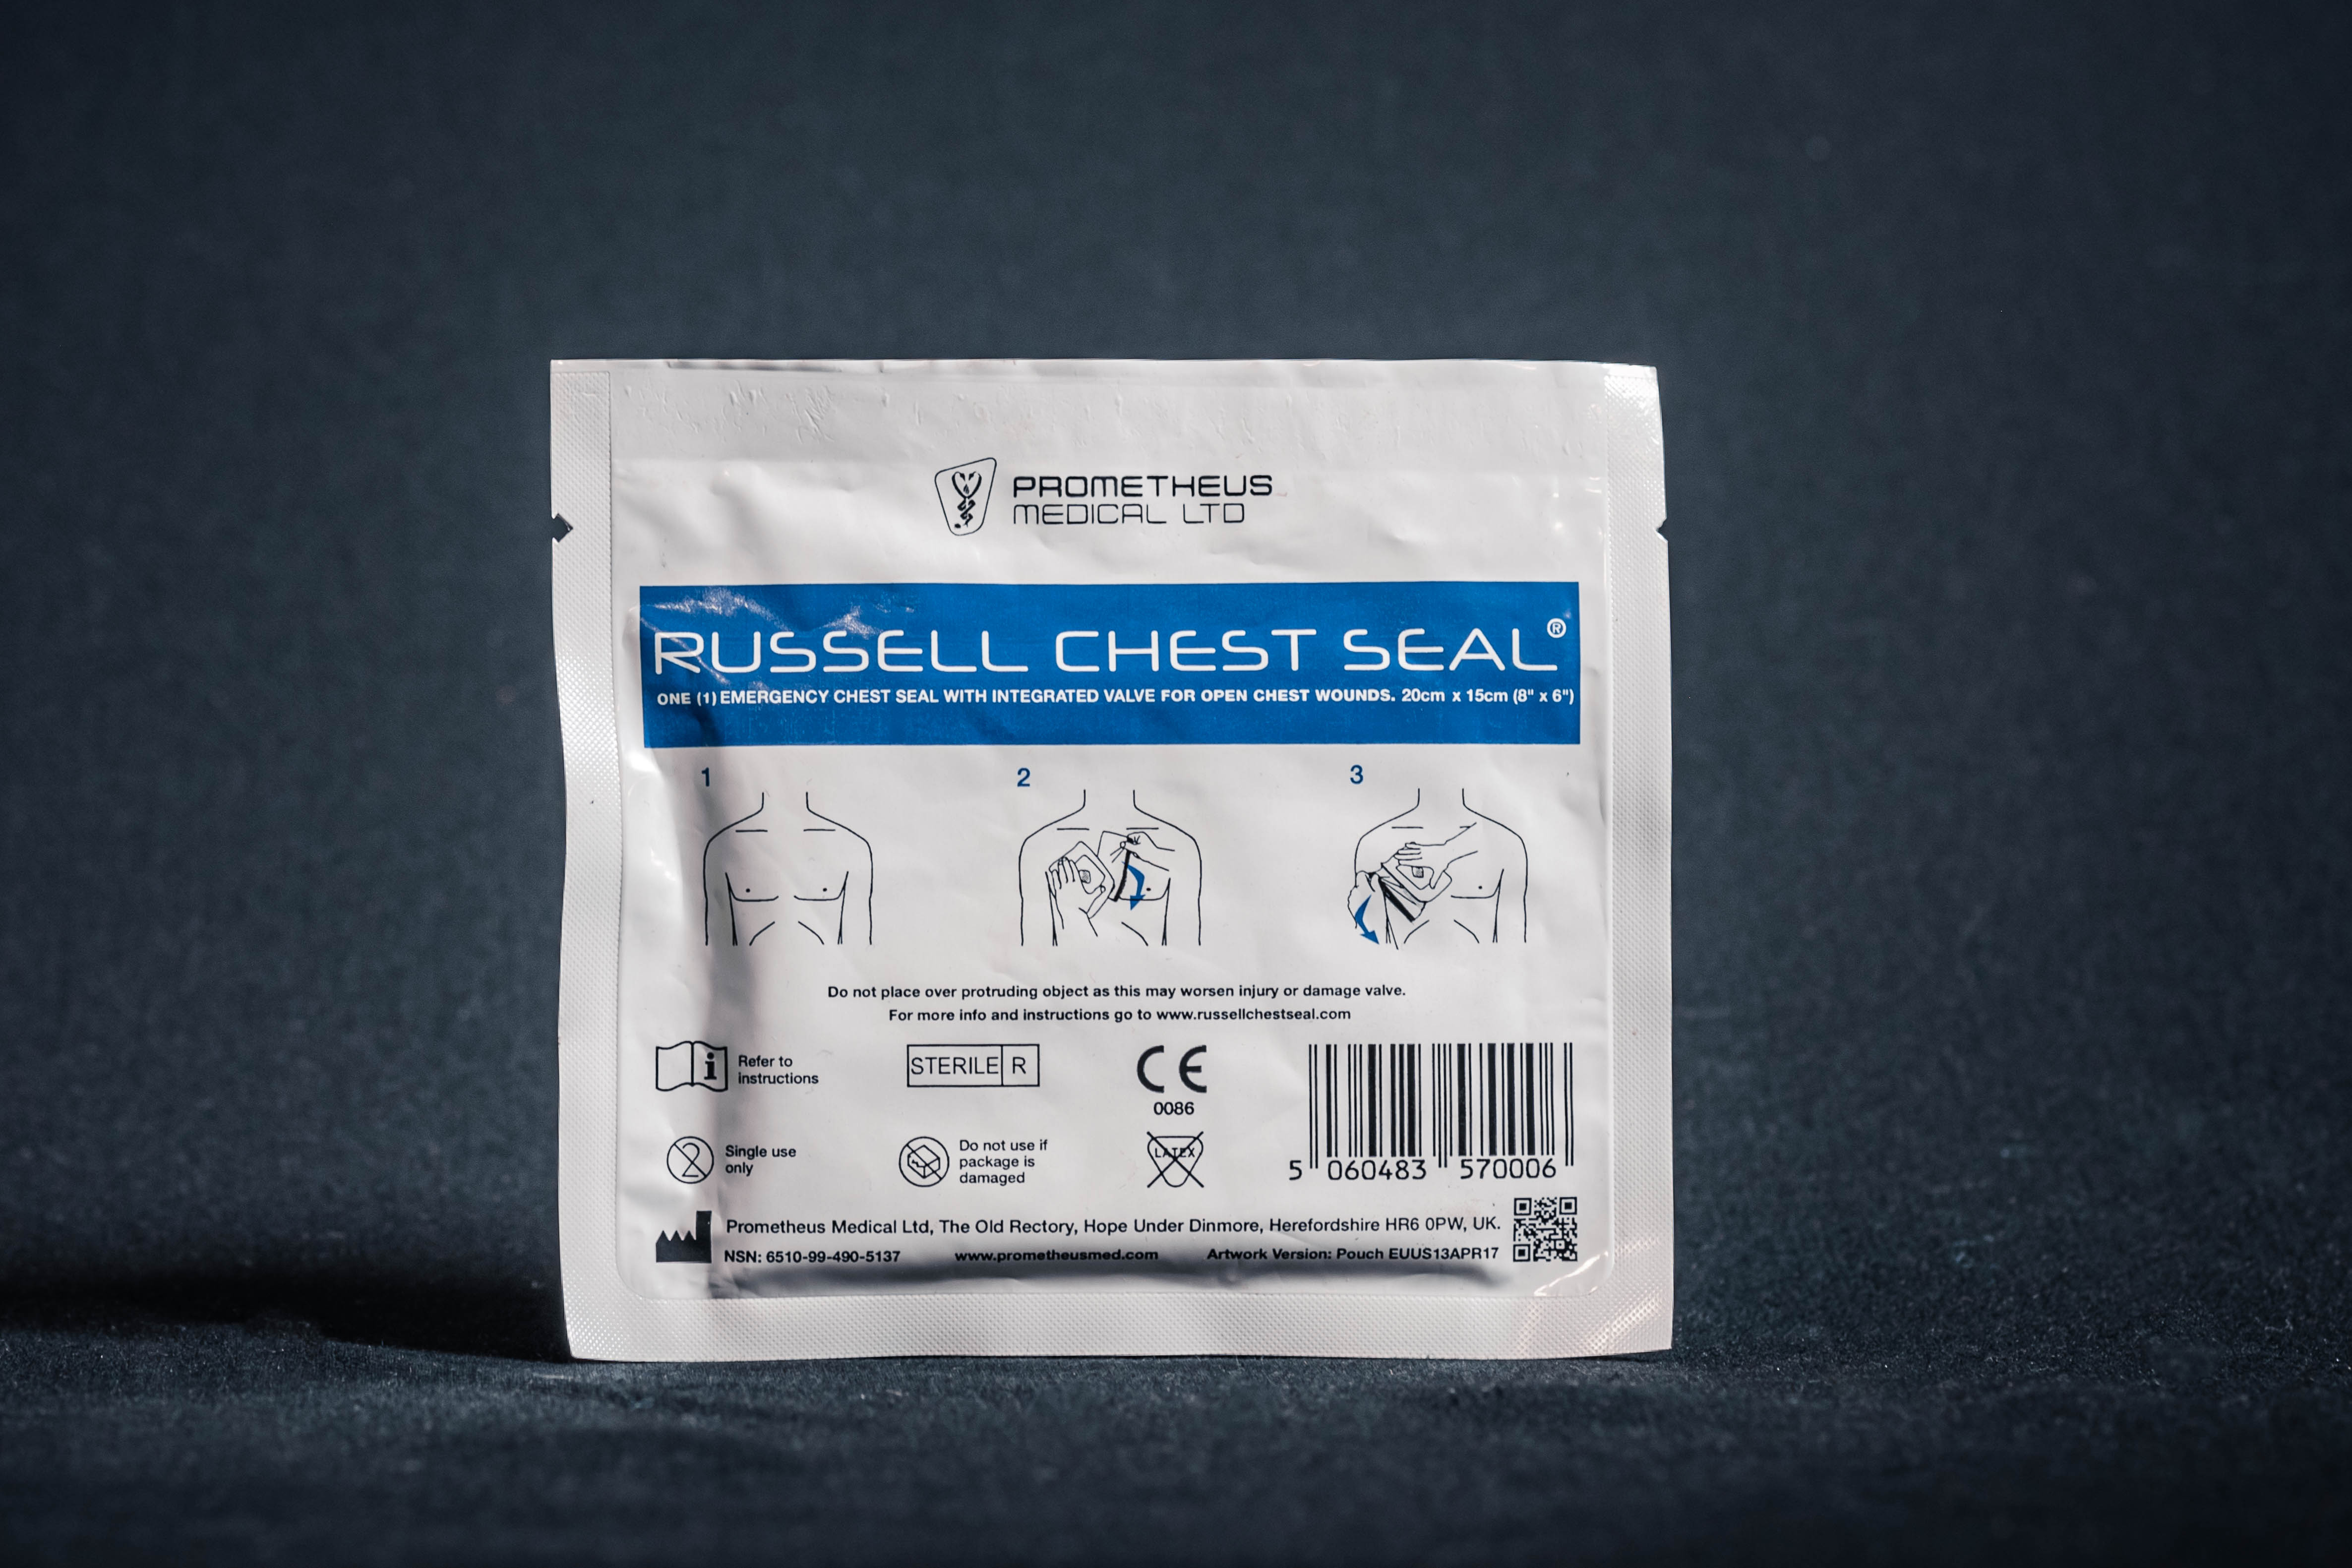
The physics of the abdominal cavity and how you breath are slightly complicated, but here’s what you need to know in order to understand why and when to use a chest seal. The diaphragm is what allows us to breath in; it contracts downward, creating negative pressure, and thereby pulling air into the lungs. If someone has a penetrating chest wound, (a hole in their chest), that hole will suck the air into the cavity outside of the lungs, deflating them and making breathing difficult.
A chest seal is loosely similar to saran wrap, and is used to cover that hole and allow the injured person to breath again. One side of it has a sticky material to stick to the skin, and that’s the side you want to apply to the chest. Some chest seals come with vents to allow trapped air and blood to escape, and you want that vent facing upward. Be aware that sealing the hole can create other complications, like a tension pneumothorax, that only a trained medical professional can adequately deal with. A chest seal is better than nothing, but the injured person will need to be treated by higher care quickly.
ABC’s of Bleeding:
Alert 911, Bleeding, Compress.
Note that this is a different acronym than the classic MARCH (Massive Hemorrhage, Airway, Respirations, Circulation, and Head injury/Hypothermia). ABC’s deal with bleeding control specifically, MARCH is a system used to treat bleeding and all other threats to life. For our purposes, we’re focusing on the ABC’s, but it's a good idea to be familiar with the concepts of MARCH too.
A: Alert 911, give them as exact a location as you can, and follow their directions.
B: Find source of blood, look for continuous bleeding, large volumes of blood, and blood pooling under/around the patient. Clothing can hide blood, so be sure to remove big bulky clothing, like a down jacket or trousers (shears are very good for this).
C: Apply direct pressure using a towel, sweatshirt, hand, gauze, etc. pressed down forcefully over the source of bleeding, using just enough material to cover it, but not all of the material. This will help inform you if direct pressure is working, as the blood will soak through the material. If this is enough to stop the bleeding, hold until help arrives. If not, continue to the next options, wound packing or a tourniquet.
Generally speaking, you want to apply a tourniquet to the limbs (arms and legs), pack joints (hips and shoulders), and seal the abdomen. There are, of course, nuances to this that can be the subject of their own article, but again, we’re just trying to provide a general overview.
Wound packing is primarily for junctional injuries where bleeding can not be stopped with pressure, places that are not a limb or part of the torso. The pelvic region and shoulders are the areas to wound pack; injuries to the neck are not a place to wound pack. Find the source, and begin packing compressed/hemostatic gauze into it. Wound packing is not easy, and requires quality training and good practice.
Conclusion:

The journey to becoming prepared for emergencies is wrought with complicated topics. We hope this article has helped shed some light on those topics and why you should have certain medical equipment. But the journey doesn't end here; find supplemental material, take a class, and become more prepared.
We sincerely hope to never need any of these skills or items, but workshops are places full of potential danger; a slip with a bandsaw, a mistake with an angle grinder, a blade thrown by the buffer wheel, an errant strike with the power hammer, a lapse in caution around the lathe. All of these mistakes can very quickly turn into an event where you or someone else needs to treat a traumatic injury, because waiting for EMS is simply not an option.
Our passion is sharing these beautiful crafts, but with that comes sharing the potential hazards, which are ignored at your own plight. With so many online resources, there is no excuse to not find education on these topics. Be sure to check out bleedingcontrol.org and stopthebleed.org for more information and classes in your area.